Diving In To a New Year — Weekly Update January 5, 2016

That sounds much more enthusiastic than things actually were. Still it is a new year and a little enthusiasm and optimism to start things off is a good thing. I was optimistic, going into the long weekend that the extra time off would prove to be extremely productive. It was productive, I just don’t know about how ‘extreme’ it was.

I felt like my motivation was pretty low and yet I did manage to work on a few different things. So it’s not like I had no motivation. Maybe, more like, no real direction. I don’t have a deadline for anything I’m currently working on and I don’t have a real drive to get something finished. Though as long as I have been working on rigging Sticks you would think I would just want to get it done. I still made progress on some projects and even started a new one.

I did get a little more of the rigging done for Sticks. I setup the FK controls for the arms. I have a feeling I have a glitch in it that is going to come back to bite me later though. It came about at the point that I had to freeze transforms on either the FK bones or the controls, and I don’t remember which. It’s not a huge glitch. But when I did the freeze transforms the bones shifted just a little so they are no longer in exactly the same space as the main bones. It is fairly minor so maybe it won’t be an issue. Here’s how things look now with the added controls. The screen is starting to get a bit crowded and I still have the wrist and the
hand with fingers to finish up.

Sticks_3d_connected_12312015a_sm_wmI don’t know if you remember that sign for my studio that I started several months ago. I’m still working on it. And I worked on it a bit this last week. You can just see here that I hadDSCN0544_sm_wm some ink drips that needed concealing. They are a little noticeable at the moment. I’m hoping that as I get the piece done they will be less noticeable. I am working to have the lights look a little glow-y and then have the dark background. I’m a little concerned that the word, “Studio”, is going to get lost in the background as I continue so I am planning on going in and adding a lighter colored glow or outline, I’m not sure which yet, to the letters so they will stand out a bit more.

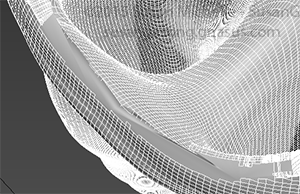
There is an advantage to having large tedious or just repetitive projects to work on. When you have the desire to work on something, but nothing specific calls to you then you can just work on those projects. Cleaning up Greezbly in 3ds Max is working out to be a bit Greezbly3DS_1022016c_c_sm_wm like that for me. It’s really a little too overwhelming to try and tackle all at once. And each component looks like it’s going to have its own issues. But, if I do a little at a time then before I know it I will have it done or have the problem solved. So I worked on Greezbly. Or more specifically I worked on the pants that Greezbly is wearing. I was trying to clean up all the extra edges and vertices and then changed tactics. I did make another copy of the pants before I started the new strategy, just in case it didn’t work out. I decided that it might be easier to just delete the messed up faces and the faces that were too dense. ThGreezbly3DS_1022016a_c_sm_wmen I could recreate the faces, hopefully fewer and more efficiently. So I got all of the offending faces at the waist deleted and the ones at the ankles. Then I tested out my idea for just creating new faces.

It looks like it is going to work ok and I’ve got most of the waist re-constructed. Though it’s not complete. I have the faces re-constructed, I haven’t adjusted them to make everything lay nicely yet. I have to finish recreating the faces in the front of the waist and then I can start adjusting them to re-position them to make the waist band lay against the shirt more smoothly. Here’s a look at the new faces in the pants and what still needs to be done.

Greezbly3DS_01032016b_c_sm_wm  Greezbly3DS_01032016d_sm_wm Also, here’s a look at how it looks at the moment up against the shirt. You can see the jagged gaps between the shirt and the pants. This is the part, in particular, that I will be needing to fix.

Greezbly3DS_01032016g_sm_wmI needed some breaks from working on Greezbly and so I started modeling my robot. The one from the sketch I showed you? Here’s the sketch.

20151116_153155_sm_crop_wm

I really like him. I think he turned out to be kind of cute and I should finish him up and give him a body and all that. He’d be great friends with Greezbly and Sticks. So I started working on the robot. I will admit that I have been trying, in my head, to figure out exactly how to go about creating the shape of the robot’s head. I went with a sort of odd look that doesn’t lend itself to being easily created in 3d. Or maybe it does and I’m not going about it right or I’m using the wrong program. Anything is possible. I did manage to get the head shape started and even some of the detail work for it started. I should probably wait for that until I have more of the robot blocked in. But, when you’ve been working on figuring something out sometimes you just have to take it that little bit farther.

I started out with a cube and the free-form 4x4x4 cage (I forget exactly what that modifier is called). It worked ok, though, I think I would have been better off not using it. I got the start of the silhouette and then started on that angled area for the top. This is the part that I was working on in my head. I added some edges to get more the look I wanted instead of it just looking like a concave section. I want it to have crisp angles and look intended and not like it got smashed with a baseball bat. To get it to look the way I wanted I used the cut tool and added several edges so that I could deform the shape with a bit more precision. I
think I could have done that part differently and it might have been easier. I don’t think I’ll try to re-do it now though. Once I had one side of the top part looking about right then I deleted the other half of the cube I started with and mirrored over what I’d done. Then I welded the vertices together and did some tweaking. Then I deleted the bottom half of the cube and mirrored the top to the bottom. This worked out well. I’ve even started a little detailing on the top section.

Robot_0132016a_c_sm_wm  Robot_0132016d_c_sm_wm

As you can see, even for low motivation, I was fairly productive. I even managed to get started in Unreal Engine. I’m considering picking up a book for it. I’ve found one that looks pretty good. The only thing I don’t like about the book, well two things, it’s not inexpensive, and it is not available for Kindle for Windows 8.whatever. I can get it on my Windows 7 machine and on my Android devices, as well as my regular Kindle, but that means I have to have a second device/machine to work along with it. Then again, it reads pretty good and looks like it will be good reference so I might just read it through once as a book and then go back to it for reference. I also may not need it. There are a bunch of getting started resources, documentation and tutorials for Unreal Engine right on the website and available through the tutorial button in the engine. That’s what I’ve been
working with so far. So the book may not be strictly neccessary. I mean, I’m already grasping the idea behind blueprints and how to make those work out, and I’ve only been working on learning it for a couple of days. Oh, wait, I’m by no means an expert or
seasoned vetern with them. Still, I get the idea behind them and even one of the things that I would use them for. So it may be easier to get a handle on building in Unreal Engine than I was thinking. That would be good. I’ll share pictures from Unreal when I have something worth showing. Right now, I’m still learning the bits and haven’t actually made anything worth showing yet.

Now that I’m at the end of this post, I see, I really was more productive than I realized. I may not have finished anything but I worked on a few things, and made progress on all of them. I guess my New Year is off to a pretty good start. I hope yours is too.

Check back again next week to find out if I got brave and got Sticks’ wrist rigging done, or what has become of Greezbly’s pants, or if the robot has anymore parts, or even if I’ve managed to create something worth showing in Unreal.

Posted in Weekly Updates | Tagged , , , , , | Comments Off on Diving In To a New Year — Weekly Update January 5, 2016

Just a Few More Days in 2015 — Weekly Update December 29, 2015

In case you missed it, last week was the Christmas Holiday. I had both Christmas Eve and Christmas Day off from the day job which made for a really nice 4 day weekend. I did my best to do very little of significance during that time. I was not entirely successful in that. I ended up doing a little work on Sticks and on Greezbly.

Sticks got a few more rigging steps but not much of it is worth seeing pictures of, unless you want to see the configuration screens. I’ll try to remember to get some shots of them for next time. For now, here is a shot of the arm control that I set up.

Sticks_3d_connected_12222015a_sm_wmThis is to make it easier to move the arm. It is attached to the IK goal which is really small and difficult to select. With this it will be easier to select. And it is attached to the global control so that it will move and scale with everything else. I did get several other configuration steps done, including adding a swivel control for the elbows.

Greezbly3DS_12242015a_c_wm

Greezbly got some treatment in 3DS Max. ZBrush has a plugin called GoZ that aids in exporting models to other programs such as Cinema 4D, Maya, Photoshop, and 3DS Max. Since I think I want to try to animate Greezbly at some point I want it in a program that
I’m comfortable with rigging and animating. Ok. I’m not 100% there yet but I’m farther along in 3DS Max than any of the other possible programs. So I decided I should try to send Greezbly over to 3DS Max from ZBrush. It took a couple of tries. I didn’t get all the sub-tools the first time. Once I did get all the sub-tools I set up some lights and took a nice picture. This is another reason I want to try to use 3DS Max for Greezbly. I like my lighting options better.


Greezbly3DS_12272015n_sm_wm


The only thing about the Greezbly model is that it has a lot of polygons and so it’s a bit dense for creating UV’s and if there is anything I want to adjust. Here’s a shot of all the pieces of the model in wire-frame mode so you can see just how dense the mesh is.

I tried using the Decimation Master in ZBrush to see if that would work. It didn’t look very good even in ZBrush so I didn’t try to re-send the model that way. I tried the Optimizer modifier in 3DS Max. That did some really ugly things. It took all my lovely quads and made them an annoying ugly combination of quads and tris and I’m not sure what else. This won’t work for texturing. Things will look awful. I even tried the Pro Optimizer modifier and didn’t have any better luck with that.


Greezbly3DS_12272015m_sm_wmGreezbly3DS_12272015d_sm_wmAs you can see there are some areas on the pants, at the waist, in particular that look like they might be part of what is making the optimizer go all crazy. There is also the issue of these additional mesh edges. At first I thought they were artifacts. It turns out they are not. They are the interior mesh of the pants poking through. Apparently I got a few areas a bit thin.

So back to those messy areas. I decided to start trying to thin them out myself and then I can reconstruct the mesh. The rest of the mesh around those areas are really nice quads and so once I thin things out and get rid of the ugliness I can recreate the using the create edge tool and connecting the appropriate vertices. I need to do this at the waist and at the ankles for the pants. I have a feeling I’m going to have to do something similar for the shirt and boots. I haven’t looked into it yet. The ankles of the pants weren’t too bad. I basically just cut them off. But I ended up with some rogue vertices that I have to figure out what to do about. Still it was faster than cleaning up the waist. Which I am still doing. Here a before and after of the ankles and also a before of the waist and a look at what I’ve done so far.

Greezbly3DS_12272015c_c_sm_wm  Greezbly3DS_12272015k_c_smGreezbly3DS_12272015b_sm_wm  Greezbly3DS_12272015j_sm_wm  

I did check to see what was happening to the model as I did this. It can be difficult to tell when you are looking at the wire-frame so I took a before and as of now shot of the waist area.Greezbly3DS_12272015o_sm_wm

Greezbly3DS_12272015p_sm_wm

Greezbly and Sticks weren’t the only things I worked on. Though Greezbly sure got the most time, at least over the weekend. I also started a scene that I’ve had in my head for a while. I think the lighting is what will be most important for it but there is a lot that needs to be in place to make the lighting behave correctly. So I started putting pieces in place and began the first pass of basic details. I was inspired to work on it after playing Disney Infinity 3.0.

I like Disney Infinity 3.0. It’s a lot of fun. And I really like the idea of the Toy Box creation tools and all that. But as I have gotten farther into it, at least with the decorating and expanding of my INterior, it is and feels, a bit limited. Now there is a lot of stuff that can be done and I still look forward to figuring out how to set up the different games and challenges. However, there is more I want to do than I can do in the Toy Box. Which means I am going to have to start figuring out something like Unreal Engine or Unity to build an interactive world. At this point, I’m pretty sure I’m going to work with Unreal Engine. Now I’ve got to start learning it.

So it looks like all that trying to do nothing of significance wasn’t entirely successful. Or maybe it was. It certainly helped me find a bit of motivation to start working on things I had not got to yet. So check back next week when we will be in the early days of a New Year and find out if I’ve managed to make more progress or do nothing of significance.

For those of you attending parties and what not, please be safe. And Happy New Year.

Posted in 3D Modeling, Weekly Updates | Tagged , , , , , , | Comments Off on Just a Few More Days in 2015 — Weekly Update December 29, 2015

It’s Always Something — Weekly Update December 22, 2015

It seems lately there is always something getting in the way of, or making it difficult to work on the things I want to work on and even the things I need to work on. And if those things don’t get in the way then procrastination and bit of slacking take over and
contribute to the blockade.

As you might guess I had a bit of that this week. A migraine and a building ear infection conspired against me off and on for most of the week. In spite of that I did manage to get a little more work in on rigging Sticks.

Sticks_3d_connected_12212015a_sm_wmI took a picture  for the work on Sticks though it is not that exciting. I started working on the IK-FK blending. This went really smooth on the left side. I was able to set up the wire parameters and have the IK bone chain as well as the regular arm bone chain both move when I moved the IK goal. I was even able to use the slider tool, which is where I plugged the wire parameters into, to decrease the IK influence on the arm chain. That was fun.

As often happens, the other side did not go as smooth. It looked like it was ok all through the process of setting up the wire parameters. All those steps seemed to go just fine. When I went to test it, moving around the IK goal for that side things didn’t work right. The two bone chains weren’t moving together like they should and the slider adjustments had no impact. As best I can tell, I missed some constraint set up. There was a step to constrain the arm bones to their corresponding IK and FK bones. I’m not sure exactly which part I messed up, but deleting all the constraints and then creating them again seems to have fixed the problem.

And yet… I also ran into some weirdness with the elbow and forearm bones when I tried to freeze their transforms. I got some odd flipping. I adjusted the bones back where they should be and then tried the freeze transforms again. That seems to have done the
trick.

It looks like the next step should be to add the FK chain into the mix. Hopefully with the things worked out on the right arm(this was the trouble maker for the IK chain) it will go smoother. Of course the real challenge to getting that done is the self discipline and motivations to just do it. Butt in chair time, as they say.

With this next week being Holiday time it will certainly be a challenge to stay focused. I’ll do my best.

In addition to enjoying the time off, and working on Sticks, I will probably be spending some time with Disney Infinity. I saw a presentation by a group of people from Disney Interactive at the ZBrush Summit this year. The presentation was on how they make the
figures for production. They said that often the character model that is created for production is then used in the game, with a little polygon refinement. This makes looking at the characters on the splash screens kind of interesting. Aside from the character
modeling, one of the things that has me interesting is the Toy Box and the ability to make your own games within it. I was only mildly interested in that at first. However, after poking around at some of the components available, I think it could be really
interesting, enlightening and fun as a step for learning to create stand alone games.

So that’s what my Holiday week and weekend are looking like; working on Sticks, and maybe Greezbly, and poking around in Disney Infinity. I hope you all have a fun and relaxing Holiday weekend whichever Holiday or Holidays you may be celebrating.2015_HolidayCard_wLights_11252015k_sm_sm_Text_wm

Before I go, I would like to give a shout out to the friend from the day job, who gave me one of my cards today. What a wonderful gift.

Posted in 3D Modeling, Weekly Updates | Tagged , , , , , , | Comments Off on It’s Always Something — Weekly Update December 22, 2015

All About Sticks — Weekly Update December 15, 2015

This week it’s all about working on Sticks. Which sounds much grander than it turns out to be. Remember, it is the holiday season and that means, endless distractions.

Even with all the things to tear me away from my projects, and Sticks, I did still manage a little time to work on him. It was a long week and most nights I didn’t have the brain power to stay awake long enough to figure out what the next step in rigging Sticks was to be. The couple of nights I did, I decided to work on some fairly small bits.

I was going to start with the next step which was mirroring the arm and hand bone chain over to the other side. I had a suspicion that I had missed a step in creating the hand bones and when I started watching the mirroring step I found that I was right. Fortunately I had made a note at the time so that I was able to go back to the correct video. In the video, as the person is talking about and naming the hand bones he mentions needing to link the finger roots to the hand bone. When I was doing this step, I was still renaming bones and didn’t look to see that he wasn’t just saying it was a step that needed to be done, he was doing the linking. I missed it. So that’s why when I select the hand bone and press ‘ctrl’ + ‘page down’ I wasn’t getting the fingers.

So I linked the finger roots to the hand bone and now when I select the hand bone and press ‘ctrl’ + ‘page down’ It selects the hand bone and it’s nub as well as all the finger bones.

I have decided to add finger bones to the hands even though they are blocks and thus don’t really have fingers. I figure being able to bend them a bit will add a nice touch. As I was looking at the finger bones I realized that I will need to go back to the model part of Sticks and add some edge loops to the hands to allow for that bending without funny crimping or tearing or weirdness.

So once the fingers were properly linked I started the mirror process. I selected all the bones on the left side and then using the bone tools menu I mirrored them to the other side. I don’t know if I could have used the regular mirror tool for this. It’s possible not. This did a nice job, or appears to have, of getting the thumb correct and I don’t know how well that would work with the global mirror tool.

Here you can see just the arm and hand chain for the left side.
Sticks_3d_connected_12102015b_sm_wm Sticks_3d_connected_12102015a_sm_wm
And here I have mirrored it over to the right and recolored it so it’s easy to distinguish.
Sticks_3d_connected_12102015e_sm_wm Sticks_3d_connected_12102015f_sm_wm

In addition to the base arm chain the IK and FK bones that I had created also had to be mirrored over. Even though there are no hand bones for those chains, I used the bone tools mirror for them as well. The nice thing was that since I already had the distance set from the first mirror, I didn’t have to change it. It was the same for the IK and FK chains. I didn’t recolor them for the new side since the more important part is if they are IK or FK chains.

Here is the FK chain mirrored.
Sticks_3d_connected_FK12102015l_sm_wm
And here is the IK chain mirrored.
Sticks_3d_connected_IK12102015i_sm_wm
They don’t look any different other than their coloring.

Of course once everything was mirrored over they all had to be renamed so the name reflects that they are the right side and not the left side.

That is all I got to work on this week. I had wanted and hoped to get more done but I knew with all I had going on, and particularly the part where my boss at the day job was out on vacation all week, that I wasn’t going to get much done. And while I have hopes for this week coming up, it is still the holiday season and there are still a few things that need to be taken care of, so as much as I would like to get the rest of the rig for Sticks completed so I can skin him to it, I don’t see that happening this week.

Still, I do intend to get something done so check back next week to see where things are at.

Posted in Weekly Updates | Tagged , , , , | Comments Off on All About Sticks — Weekly Update December 15, 2015

I Thought I’d Get More Done — Weekly Update December 8, 2015

Last week was a partial week back at the day job after the vacation and Thanksgiving holiday and I really thought I’d get more done than I think I did. I think I feel that way every week when I sit down to make my update. Still the week wasn’t the total waste it came close to being.

I didn’t start to get back to things until later in the week. Over the vacation I purchased a new hobby. I decided that to go along with constantly learning guitar, I would start learning saxophone. It’s an alto saxophone for those that might wonder. Once it arrived, it proved a fairly persistent distraction. From learning how to put it together, tune it, and then finally get a proper sound out of it, it kept me going to the book and the computer to figure out some little bit. I am happy to say that in just a week I am almost consistently getting a proper sound and not constantly squeaking. Undoubtedly to the relief of my neighbors.

When I finally got back to working on art projects I returned to working on rigging Sticks in 3ds Max. I’m up to his arm and hand. The first thing I was to do was to create the shoulder and arm bones and then the hand bones. Here you can see them inside his arm and hand as well as without the body around it.

Sticks_3d_connected_12072015a_sm_wm Sticks_3d_connected_12072015c_sm_wm

As you can see in the next picture, Sticks doesn’t really have fingers, or a thumb, just a block for his hand. I considered not using fingers or a thumb but decided I want the block to be able to deform as if pointing, even if it’s a rudimentary point. So I’m giving him two fingers and a thumb. Though without as many joints as normal. Here is the hand with the body over the bones and with just the bones showing.

Sticks_3d_connected_12072015b_sm_wm Sticks_3d_connected_12072015d_sm_wm


After getting the bones in place the next step was to start setting up for IK and FK constraints. This consisted of two duplicates of the bones for the arm but not the shoulder or the hands. If I remember correctly the point in the constraints and the way it’s going to work is that it will keep the arm and elbow from flipping around funny. In addition to the duplicate sets of arm bones I created the helpers that will control how much with one is influencing the movement. The thing I didn’t realize about them is that they appear facing me in every view. They don’t zoom in and out like the rest of the pieces in the window. They work more like a heads up display, sitting on top of everything. They are the funny looking slider things with the square at one end and the circle at the other and the triangle as a pointer on the bottom. It took a little getting used to they way they behave in the viewports. Here you can see what they look like in the perspective view and in the front view.

Sticks_3d_connected_12072015e_sm_wm Sticks_3d_connected_12072015f_sm_wm

I spent a little time working on Greezbly. Much more than I intended when I sat down. I thought I’d spend an hour working on the alien and when I looked up I think it had been 2 and a half hours. When last I wrote about Greezbly I wasn’t terribly excited with the look I had created. In all this time that I haven’t worked on the look I’ve had a chance to think about what was bothering me. One of the things had to do with the skin coloring and detailing. Greezbly is meant to be a bit stylized, dapper, and lite and that wasn’t the look I was getting. I was getting something more along realistic lizard or reptile like lines. So I changed the skin tone and made it lighter and brighter. The thing I noticed as I did this was that some of the detailing on the head came out better. Once I had the skin right I moved on to the clothes. The orange and dark blue were too dark and too shiny. I still wanted some shiny but not the whole outfit. So I changed the orange to a more yellow color and left it the shiny material. I think it’s a plastic. And I changed the dark blue to a lighter colored blue and the material to something more like a pearl look. This is where I was really able to see the difference the lighter color and material made in being able to see some of the subtler details. These are just basic Zbrush renders, not composites, and I still need to change out the boots but here’s what I’ve got done so far.

AlienDec2015_12062015b_sm_wm AlienDec2015_12062015e_sm_wm

The other thing I did this week was pick up my art that was hanging at FuManchu Cupcakes. I would have liked to have sold one or both, because that would be cool. However, since they didn’t sell, I hung them on my walls. The guitar piece goes nicely over the television in the living room.

I’m really glad to have had the opportunity to have my art showing someplace other than my home or my phone and I would like to have more of it out there. With that in mind I have started a piece that I was thinking of doing a series around and then maybe having more pieces to hang. The interesting thing is that I haven’t been excited to work on it. It’s the Gibson head stock piece. It’s in acrylic paint, not ink. And it’s meant to be done more as a stippling painting. I love the stippling look, especially in pen and ink, and I even like the pointillism work of Georges Seurat. I find creating a stippling piece in paint to be frustrating and messy looking at best. I suppose if I got it farther a long so that I could see it come together better I might not feel that way. However, I’m not convinced. I like the really tight and clean look and the control you can get with the smaller dots. So I’m not sure how quickly I will finish the painting. I do still want to do the series, I just may go back to ink to do it.

That’s my week for the most part. The little robot I showed you last week is nagging at me and starting to want to be a 3d animated creation. So the modeling for that could start soon. It does depend a bit on how well I stay on task with things. It’s a bit of a busy week and weekend coming up with a party and a play to attend. Still, Sticks needs to get rigged and animated and Greezbly needs to get finished up. I have a request for a more robust version of the alien, apparently this one is too skinny and starved looking.

Don’t forget, if you are still needing a unique card to send to someone you can check out my Zazzle store at the link to the right. And check back here to find out what I get up to next.

Posted in 3D Art, Weekly Updates | Tagged , , , , | Comments Off on I Thought I’d Get More Done — Weekly Update December 8, 2015